Category:

Cooking With Kids

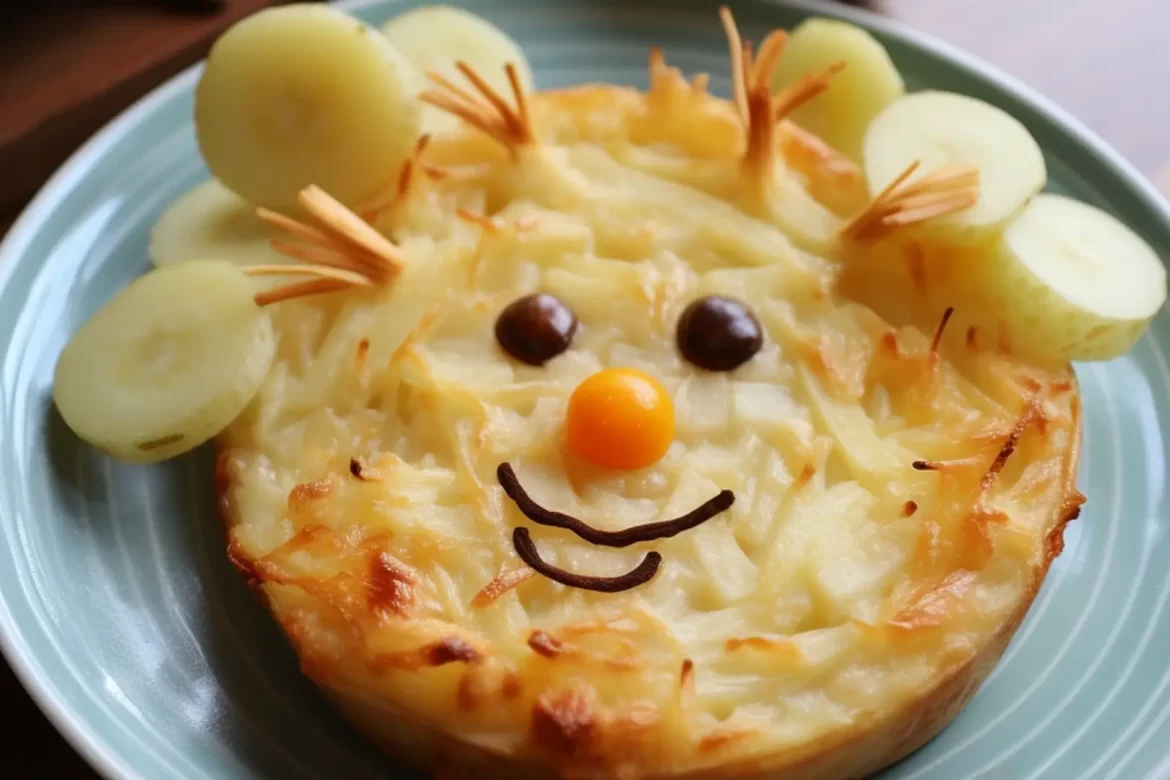
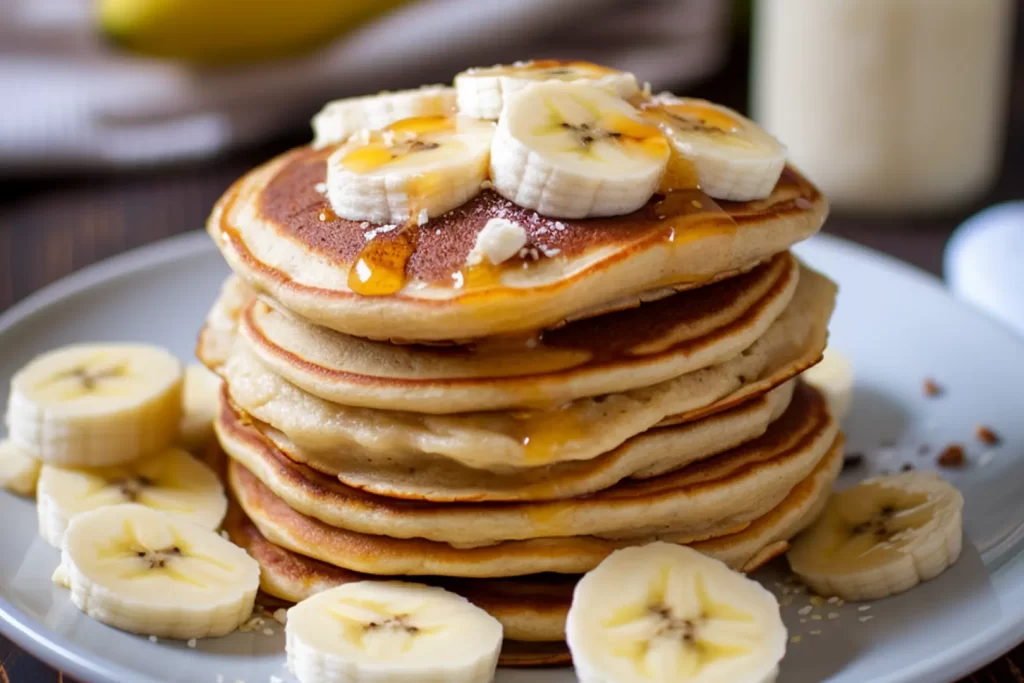
Banana Pancake Boogaloo

by NRFT

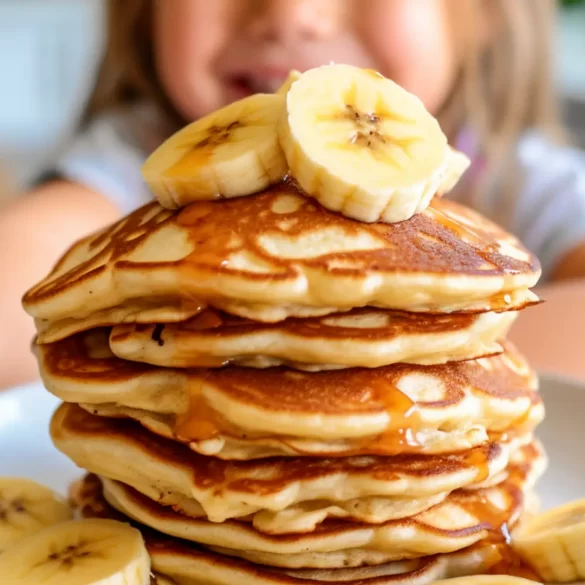
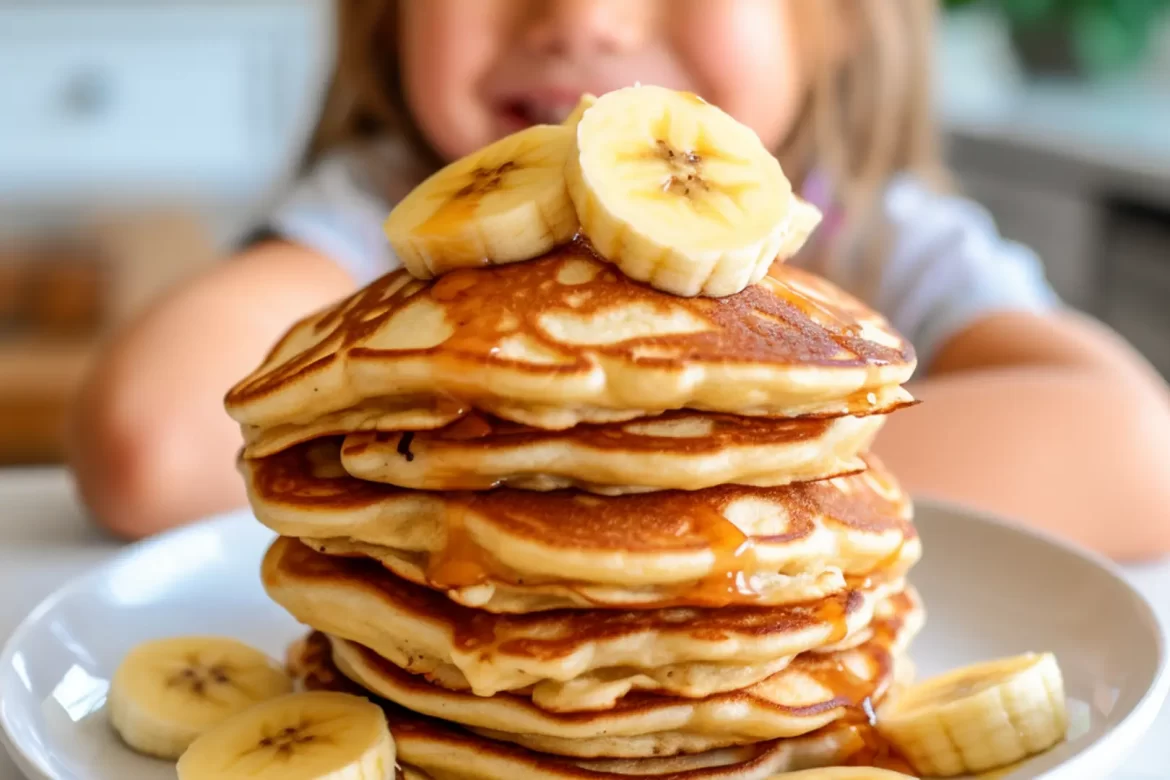
Alright, here we are, flipping these cute little banana pancakes, and I’m getting all the feels about how this sweet, simple cooking sesh mirrors a day in the parenting life, particularly the art of BALANCE. Yeah, y’all heard me, balance – that precarious dance every parent knows all too well. Now, these pancakes, they require a certain kind of finesse, just a bit of careful flipping to get ‘em just right. Not too different from us parents juggling work calls, kiddo’s playtime, and somehow managing to keep the laundry from becoming a mountain range, right? We’re perpetually flipping our own pancakes, trying not to let them (or us) fall flat on the face.

Now, when you pour that batter into the pan, watching it sizzle and bubble, it’s a waiting game, ain’t it? You gotta give it that precious time to cook on one side before flipping it over. Oh, how this resonates with the patience we embed in parenting! There’s this constant inner dialogue about when to step in and when to let things simmer for a bit. Just like patiently waiting for that perfect pancake-flipping moment, we’re often gauging when to swoop into those toddler tiffs or navigating through the tidal waves of tantrums and emotional outbursts. It’s the perpetual balancing act of providing space for autonomy and being right there to catch ‘em when they need us.

And then there’s the inherent sweetness in every bite, reminding us that amid the chaos, the mess, and the sometimes literal pancake flops, there are those melt-in-your-mouth moments that make it all worth it. That sweetness isn’t just in the bananas; it’s in the sticky little fingers wrapping around ours, the soft, sleepy cuddles in the quiet of the night, and the unsolicited “I love yous” that bubble up from their pure little hearts. Much like our mini pancake stacks, parenting is layered with moments that are unpredictably messy yet undeniably sweet, prompting us to savor every bite.
Print
Serves: 3
Nutrition facts: 200 calories 20 grams fat
Rating: 5.0/5
( 1 voted )

Ingredients

  • 2 Ripe Bananas: These ain’t just your everyday bananas, no sir. These bad boys have been cooking in the kitchen like Russ, aging like fine wine, becoming all sweet and flavorful, just waiting for a chance to slide into a recipe.
  • 2 Large Eggs: They're not here to cluck around, they mean business. These two are the glue, the bind, the force that’s gonna hold our dish together.
  • 1/2 Cup of All-purpose Flour: This right here is the stage, the platform, giving our stars the place to perform their tasty spectacle.
  • A Dash of Cinnamon: Because you know we keep it classy and a little sassy! It’s like the flash and dazzle, the fireworks of our culinary show, making sure every bite you take leaves a little twinkle on your palate. It's a dash of “Oh, what was that delightful little kick?”

Instructions

  1. The Mushing Business: Aight little chefs, first off, we're grabbing those bananas and showing them who's boss. Peel ‘em and mash ‘em in a bowl. We're talking mush, like when the toddlers discover they can squish their peas, but this time, we're doing it on purpose.
  2. Eggstra Special Addition: Next up, crack those eggs into the bowl. Give it a good whisk, mix it all up till the eggs and banana become best pals.
  3. Flour Power & A Dash of Pizzazz: Alright, time to sprinkle in that flour and cinnamon - turning this mushy mix into a beautiful, slightly thick batter. This is our base, our foundation, like how every solid day needs a little planning and a dash of spontaneous fun (that’s our cinnamon talking)!
  4. Flip It Good: Finally, heat up that skillet and drop in little circles of our pancake magic. We’re cooking ‘em for about 1-2 minutes on each side until they’re golden. Now, flipping can be tricky, but remember, whether they're perfect circles or whimsical shapes, they'll still be delicious. Like our family outings, it doesn’t have to be perfect to be absolutely wonderful!
  5. Sharing and Caring: Get ready to serve these bad boys up with whatever your heart desires - a bit of syrup, maybe some sliced fruit, or hey, enjoy them as they are!

There we go, good folks! Simple, sweet, and somewhat healthy! Kinda like how we navigate through our days with our little ones – trying to find that balance between the easy, the nutritious, and the downright fun! So here’s to embracing the mess, enjoying the moment, and licking the plate clean at the end of it all! Cheers to delicious moments and belly laughs in the kitchen!
0 comments
0 FacebookTwitterPinterestEmail

We All Scream for Ice Cream

by NRFT

Ah, Ice Cream! Whipping up this homemade ice cream is much like bringing up them kids; it’s all sweet and delightful but man, it requires patience, care, and yep, a bit of that chill. And, in this case, an ice cream maker to go along with the recipe.

Now, just like raising little humans, making ice cream from scratch lets you control what goes in it. No unnecessary stuff, no crazy additives – just pure, unadulterated joy. Similarly, in the world of parenting, we strive to give our kids the real-deal life lessons, sans any unwanted influences. And oh boy, it ain’t always a smooth ride! There are spills, moments when you think you’ve lost the plot (or the batch), and yes, times you gotta wait patiently, just looking at that freezer (or in parenting terms, life), hoping the results turn out spectacular!

Ahaa, but the churning, don’t even get me started! Every parent knows, the churning of life, navigating through the teenage years, is like keeping that ice cream mixture moving to avoid it becoming an icy mess! We guide, we nudge, we keep things on track, ensuring that the end product is smooth, delightful, and something we’re darn proud of. It’s no child’s play (or maybe it is, I’m confused now), but the twirls and swirls of parenthood, much like our creamy concoction, are full of unexpected blobs and globs. Yet, the key is to keep churning, keep moving, and eventually, we’re all going to enjoy the sweet outcome together!

So, as we delve into this homemade icy journey, every scoop, every swirl, it’s a reminder – while we can easily pick up a ready-made tub from the store (or some off-the-shelf parenting advice), there’s nothing like the homemade stuff. Through the stirs, the chills, and the patiently waiting for it to set, we’re crafting not just ice cream, but a lifetime of memories, and deliciously so. And whether you’re a parent or an ice cream maker, remember: the sweetness in the end always, always comes from the love and patience stirred in along the way

Homemade Ice Cream

Print
Serves: 4
Nutrition facts: 200 calories 20 grams fat
Rating: 5.0/5
( 1 voted )

Ingredients

  • 1½ cups Heavy Cream: That's right, folks, this is the smooth, the rich, the luxurious vibe we're bringin’ into our ice cream party! Picture it as the comfy bed you just don't wanna get out of in the morning.
  • 1½ cups Whole Milk: Stay with me now, this ain't just a bystander, it’s the underdog, the quiet hero that’s makin’ sure our ice cream has that easy, breezy glide on your palate. Like, you know, that reliable friend that always knows how to keep things cool and flowing.
  • ⅔ cup Cane Sugar: Now, this is where the magic happens, people! This is our sweet talker, our charm, our charisma in the mix! It’s the joy, the laughter, the sweet moments that make parenting worth every second of lost sleep.
  • 2 teaspoons Vanilla Extract: Ooh la la, we’re getting fancy! This right here is our exotic, aromatic dreamboat sailing into the mixture, whisking us away into a world of fragrant splendor. It's like the unexpected moments of calm amid the parenting chaos - rare, but oh-so-needed.
  • ⅛ teaspoon Sea Salt: A pinch, just a whisper of this crystally wonder, and BAM! We’ve amped up our ice cream game, my friends. This little guy elevates all the sweetness, giving it a pop, a surprise! Much like those tiny unexpected wins in a parent’s day – like when the kiddos nap at the same time. A small addition, but a game changer!

Instructions

  1. Getting Things Heated: Okay, my good people, we’re going to bring together our fabulous five - the cream, milk, sugar, vanilla, and salt, into the meeting room, also known as our medium saucepan. We’re warming things up on a medium-low heat, stirring the pot (literally) for about 5 minutes, until all the sugar decides to disappear into our mixture. That’s right, dissolve and blend, we're creating harmony here, just like managing all those tiny chaotic moments at home into a smooth running operation.
  2. Chillin’ Like a Villain: Next up, we’re cooling things down, giving our mixture a little R&R in a heatproof bowl. Let’s slap a lid on it and pop it into the fridge for a chill session that lasts 2 hours, or hey, let it camp out overnight if you like. Kinda like putting the kids to bed and finally having that ‘me’ time, even if it’s just a short sweet window to binge-watch that series.
  3. The Churn Up: After our mixture's well-rested chill-time, we're bringing it back out, giving it a good whisk (like hyping them up for a day of fun) and into the ice cream maker it goes! We're churning, turning, and grooving to the beat for about 20 to 30 minutes. Yep, it’s going to be a bit soft, but that’s okay - for a firmer scoop, you’re going to want to freeze it in an airtight container for an additional 2 to 4 hours. Imagine this step like trying to get the kiddos to settle down - sometimes it’s quick, sometimes it’s a process.
  4. Storing and More-ing: Keep that delightful creamy dream in an airtight container and it’ll be good for up to a month in your freezer. If it decides to be stubborn and too firm to scoop, no worries, let it take a breather at room temperature for a few. Much like our little ones needing a minute to transition from play to dinner time, sometimes things need a moment to go smoothly.

And voilà! Dive into that creamy goodness, enjoy those chilled moments of bliss, and don’t forget to share...or not, I won’t judge! It’s like when you manage to sneak in a sweet treat without the kids noticing – pure, undisturbed enjoyment!


Notes

You will need a home ice cream maker for this.

0 comments
0 FacebookTwitterPinterestEmail

Parmesan Pocket Passers

by NRFT

The Best Chicken & Potato Pie for Toddlers

Alright, let’s buckle up, because we’re about to embark on a saucy ride through parenting, with a Chicken & Potato Pie steering the wheel!

The Preparation – Packing Up the Car

Alright, listen, peeling and cutting those potatoes, it’s like the endless packing and prepping that comes before a family road trip. You’re peeling away the unnecessary, trying to chunk down what’s essential, just like deciphering between the fifth stuffed animal and the extra pack of wipes – what REALLY needs to come? You’re there, meticulously making sure you’ve packed all the essentials, and oh, the mess, the chaos! It’s enough to make you reconsider, but then you think of the memories, the smiles, the adventures, and you persevere. Just like when you’re mashing those potatoes – you’re taking all that prepped stuff, blending it together with love, butter, and cheese, making it something that sticks together, providing a solid, delicious base – not just for your pie, but for the memories you’re about to create!

The Simmering Sauce – The Journey Itself

Hold up, folks, because cooking that leek and shallot, stirring that flour into the sauce, it’s smooth, but it requires your attention, just like managing little ones in the back seat while navigating the roads. It’s a balance between addressing the “Are we there yet?” and making sure you’re staying on the right path. You add ingredients gradually, adjusting as you go, ensuring that the consistency is right. The unexpected roadblocks, the unforeseen spills, and the sudden sing-alongs to the Frozen soundtrack for the 10th time, it’s all in there, in that sauce, blending, adapting, and creating something that, while occasionally on the brink of catastrophe, manages to pull through into something harmonious and delightful.

The Baking and Browning – The Destination and Return

And here we go, spooning that delicious concoction into a dish, topping it with mash, and letting it bake to perfection – that’s your destination! It’s the beach day, the amusement park smiles, the hike through nature where, even if for a moment, everything aligns into a beautiful, heartwarming scene that almost makes you forget the chaos that led up to it. And the browning under the grill to finish it off? That’s the reflective, peaceful drive back, where the kids, exhausted, sleep in the back, and you glance at them through the rear-view mirror, seeing the gentle sun casting a warm glow on their peaceful faces. It’s a moment of quietude where you, despite vowing off road trips forever on the drive up, begin planning the next one in your mind, because man, those golden, crisp moments make it all worth it.

Print
Serves: 4
Nutrition facts: 200 calories 20 grams fat
Rating: 5.0/5
( 1 voted )

Ingredients

  • 1.1 lbs potatoes, peeled & cut into chunks
  • 1 tbsp flour
  • 2 tbsp butter
  • 1/3 cup milk
  • 1/2 cup Cheddar cheese, grated
  • 1/2 cup Parmesan cheese, grated (Parmesan is often lighter, so it takes more to hit the same weight)
  • 1 leek, thinly sliced
  • 1 large or 2 small shallots, finely chopped
  • 1 1/4 cups chicken stock
  • 1/3 cup heavy cream (double cream)
  • 2/3 lbs cooked chicken, shredded
  • 3/4 cup frozen peas
  • 1 tbsp chopped parsley
  • 1 tbsp lemon juice
  • Salt and pepper to season

Instructions

  1. Preheat Like a Pro:
    • You’re gonna wanna crank up that oven, so hit it with 400F. Trust me, it’s about to get hot in here!
  2. Potato-Palooza:
    • Dive into it, throw those potatoes into some chilly, salted water. Now hit the gas, we're going for a boil! But hey, cool it for 10 to 15 after the boil and let them spuds simmer until they’re soft and tender. Show them potatoes some love, mash them up nice with the butter, milk, and that deliciously melty cheese.
  3. Buttery Business:
    • Now, in another spot, melt that butter in a pan, and toss in your leeks and shallots. Be gentle, let it cook slow and soft for like 8 to 10 minutes. But keep an eye out, you don't want them turning brown on ya.
  4. Smooth Operator (Sauce Time!):
    • Roll up your sleeves, stir in that flour and cook it for a minute. Then, bit by bit, stir in the stock making sure it all blends into a smooth, luxurious sauce. (If it’s fighting you, take it off the heat, we don’t need that kind of negativity in our sauce.)
  5. Creamy Dream:
    • Now add the cream and stir. Keep stirring and bring it to just about boiling. Now we’re talking! Add the chicken, peas, and parsley. But, hey, we're not done. Throw in that lemon juice and season to taste.
  6. Assembly, Baby!:
    • Grab that dish, and let’s layer this bad boy. Spoon that beautiful mixture into a 1.5-liter dish and crown it with that heavenly mashed potato you made.
  7. Bake and Shine:
    • Slide it into the oven for about 20 minutes. We’re going for golden perfection here, folks. If it needs a little more, pop it under the broiler for a few extra minutes to get that top all nice and golden. Pro tip: set the dish on a baking sheet to catch any rebellious drips.

Boom, there it is! A chicken & potato pie that has experienced the roller coaster, just like us parents on a road trip with our little ones. It's sweet, it's chaotic, but at the end of the day, it all comes together into something beautiful and delicious! Now, sit back and enjoy the fruits of your labor!

0 comments
0 FacebookTwitterPinterestEmail

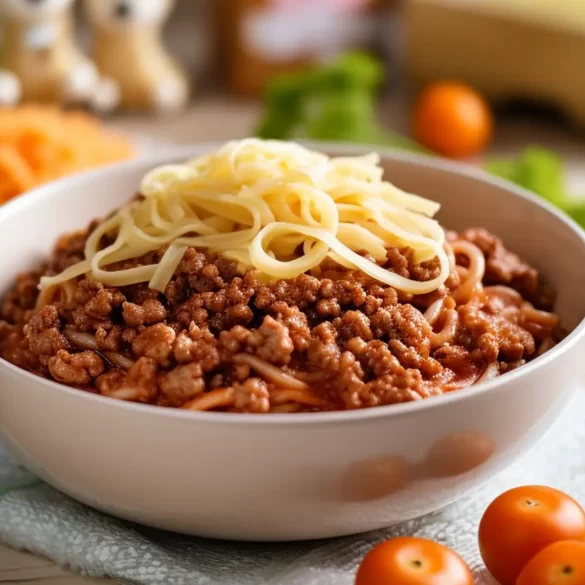
Listen up, my culinary comrades, because we’re about to delve into this delectable pot of Bolognese, but hold up – this ain’t your regular sauce and pasta chitchat, oh no! Your boy’s been cookin’ and stirrin’ but now, let’s put a pause on the culinary journey and let me drop a lil’ wisdom on ya: This Bolognese right here? It’s a metaphor, an allegory, a sneakily veiled tale of parenting, y’all! And yes, you heard it, I am entirely, 100%, unabashedly serious! So stick with me because we’re serving up more than just sauce today, we’re servin’ life lessons!

The Prepping Phase

Now, check this, that meticulous prepping phase of chopping onions, celery, and carrots – that’s just like gearing up for parenthood. Man, you’re there, cautiously chopping, preparing, trying not to cry (I’m looking at you, onions!), envisioning all those joyous baby first moments. It’s like preparing for that first day home with the newbie. You got the crib, the baby-proofing gadgets, tiny cute clothes, and diapers, oh so many diapers. But just like when that garlic burns slightly because, hey, your eyes were watering from the onions, or you looked away for just a second – parenting hits you with unexpected leaks, sleepless nights, and those moments when you’re sure the manual must’ve missed a page or two.

The Sizzle and Merge

Moving to our beef – browning independently, all sizzling and sumptuous, but oh wait! It ain’t a Bolognese yet! It needs the veggies, just like we parents, riding solo initially, but then needing to merge our individualities into this harmonious blend for the good of the little ones. You have the late nights, the disagreements on sleep training, and whether ‘baby talk’ should be a thing. But then comes the merging of flavors, where you find your groove, embrace the mishaps, and turn it into your unique parenting style, simmering into a united front where somehow things start to flow smoother, even in the chaos.

The Simmer and Serve

Now, when that sauce is all covered and simmering quietly on the stove, giving those ingredients time to meld together into something extraordinary, that’s the symbol right there of the patience and resilience embedded in parenthood. This simmering phase, it’s the perseverance through the toddler tantrums, the patient explanations of why drawing on walls is a no-go, and the late-night heart-to-hearts during the tumultuous teen years. And when it’s time to serve? Oh, we ain’t just feeding them, no. We’re looking at those faces, illuminated with the smallest joys, and somehow, every chop, sizzle, and simmer finds its worth. It’s the amalgamation of all the struggles, the highs and lows, resulting in a product that is nurtured, loved, and hopefully sets them up for their own adventures in the ‘kitchen.’

Print
Serves: 3
Nutrition facts: 200 calories 20 grams fat
Rating: 5.0/5
( 1 voted )

Ingredients

  • 1 tbsp of that good ol’ vegetable oil
  • 50g onion, we’re talking FINELY chopped, people
  • 20g celery, chopped, keep it crunchy, folks
  • That little sneak, garlic, just 1 small clove, crushed
  • 1 medium carrot, that's 85g for the meticulous among us, peeled and grated
  • 100g of lean, mean minced beef
  • 150ml of passata, that’s the smooth tomato operator in our dish
  • 100ml of unsalted stock OR boiling water, dealer’s choice
  • ¼ tsp fresh thyme leaves or if you're feeling lazy, a pinch of dried thyme, I’m not judging
  • 3 tbsp. of baby pasta shapes, get wild, pick stars, moons, whatever floats your boat

Instructions

1. Sauté Like You Mean It

Heat that oil in a saucepan and toss in your onion and celery. We're sautéing, folks, low heat, for about 5 minutes. And be kind, stir occasionally, till they're soft and whispering sweet nothings to each other.

2. The Carrot and Garlic Show

Bam! Garlic, you're up – 1 minute in the spotlight, do your thing. Now welcome your buddy, grated carrot, and let them mingle for another 4 minutes.

3. Beef’s Solo Performance

Separate pan, folks! Sizzle that minced beef until browned, let it dance, stir occasionally and let it embrace its own beauty.

4. Merge the Flavors, Create the Symphony

Bring the beef to the onion-carrot concert, pour over that luxurious tomato sauce, sprinkle in boiling water or stock (remember, dealer’s choice), and drop that thyme like it’s hot.

5. Low & Slow is the Tempo

Seal it, and let it simmer on a low heat, about 12 minutes. We’re infusing, we’re mingling, we’re creating magic here!

6. Smooth Operator

Take it off the heat, and give it a quick pulse in the blender. We want a smoother jam for our little ones, right?

7. Baby Pasta: Star of the Show

In another realm (read: pot), cook that cute baby pasta. Follow the packet's rules, it knows what it's talking about. Drain, and let it dive into that bolognese.

0 comments
0 FacebookTwitterPinterestEmail

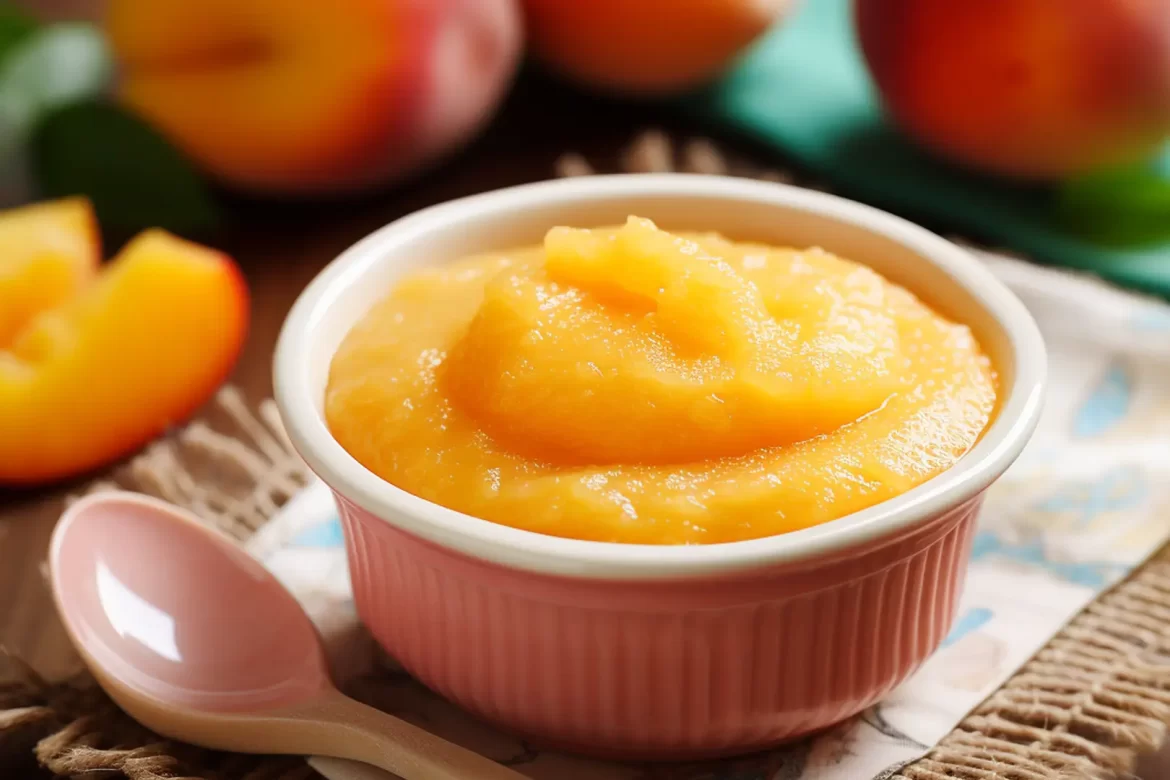
Today, we ain’t just blending peaches, we’re mixin’ life, emotions, and a bunch of squishy fruit to create somethin’ wholesome, and nah, I ain’t talking about just the puree. This is the behind-the-scenes, the uncut dad-version of making peach puree, while wrangling life, laughter, and a tiny human or two.

The Raw, Unpeeled Truth About Peach Puree and Parenting

No Dad is an Island

Fellas, let’s keep it a buck, shall we? Parenthood? It ain’t a solo journey. This peach puree recipe isn’t just a bunch of blended peaches, it’s a metaphor – sometimes things get messy, sometimes they’re sweet, and sometimes you gotta go back to the store because you forgot the dang peaches in the first place. Am I right? We’re not here to create perfect puree or to be perfect dads. We’re here to be real, to make mistakes, to learn, and to share the load and the joys.

The Messy, The Puree, and The Slightly Bruised

Now, here’s the thing – like our precious peaches, we’ve all got a couple of bruises and we ain’t always perfectly ripe. But that doesn’t mean we’re not whipin’ up something beautiful. The mess, the spills, the “oops, forgot to strain it” moments? That’s where the flavor of life lives, man.

Let’s keep those moments, let’s cherish ‘em, let’s laugh at ‘em, and heck, let’s share them so the next dad knows it’s A-OK to have a lumpy puree once in a while. Because at the end of the day, it’s all love, it’s all good, and it’s all part of the ride. Your kid won’t care. Your little one doesn’t need perfect. They just need YOU. In all your unstrained, slightly-too-thick, kinda-messy glory. Yeah, we’re still talking ’bout peaches, folks. But it’s the imperfect moments that add the real flavor to this parenting gig, too.

You Got This

We’re mixin’ more than peaches here, dads. We’re mixin’ life, family, work, and a dash of “what’s that smell?” moments. And I’m here to tell you – it’s OK. It’s okay if the puree is a bit chunky. It’s okay if it’s not the Instagram-perfect dollop. It’s yours. It’s love. And it’s exactly what they need.

Harry Potter and the Chamber of Peaches

Print
Serves: 1
Nutrition facts: 200 calories 20 grams fat
Rating: 5.0/5
( 1 voted )

Ingredients

  • 1 cup of peach slices
  • 2 tablespoons-¼ cup of water

Instructions

  1. Place them peaches in a blender.
  2. Let it whirl, add a little something to thin it if you're feelin’ it.
  3. Strain it, or don’t, your choice, papa.
  4. Serve immediately, or hey, maybe it’s a "freeze and serve when you remember it’s there" kind of day.

FAQs:
Q: Can I substitute water with something else?
A: Oh, for sure! Formula, breastmilk, tears of exhaustion - whatever you got on hand.

Q: What if I forgot to strain it?
A: Hey, more fiber, right? It’s all good, pops.

Q: How do I make this parenting thing a bit smoother?
A: Try your best, lean on your friends when you need to, and know that your best is more than enough.

And there we have it, dads and dad-like phenomenal people, a cup of puree and a gallon of real talk. Parenthood ain’t always smooth like a perfect peach puree, and hey, that’s alright. It’s the lumps that make us who we are, it’s the forgotten ingredients that teach us to improvise, and it’s the spills that show us we can handle the mess.

Remember, whether you’re a peach puree pro or a “which end does the diaper go on” newbie – you got this. And if you need to hear it today, dad, you’re doing an amazing job.

0 comments
0 FacebookTwitterPinterestEmail

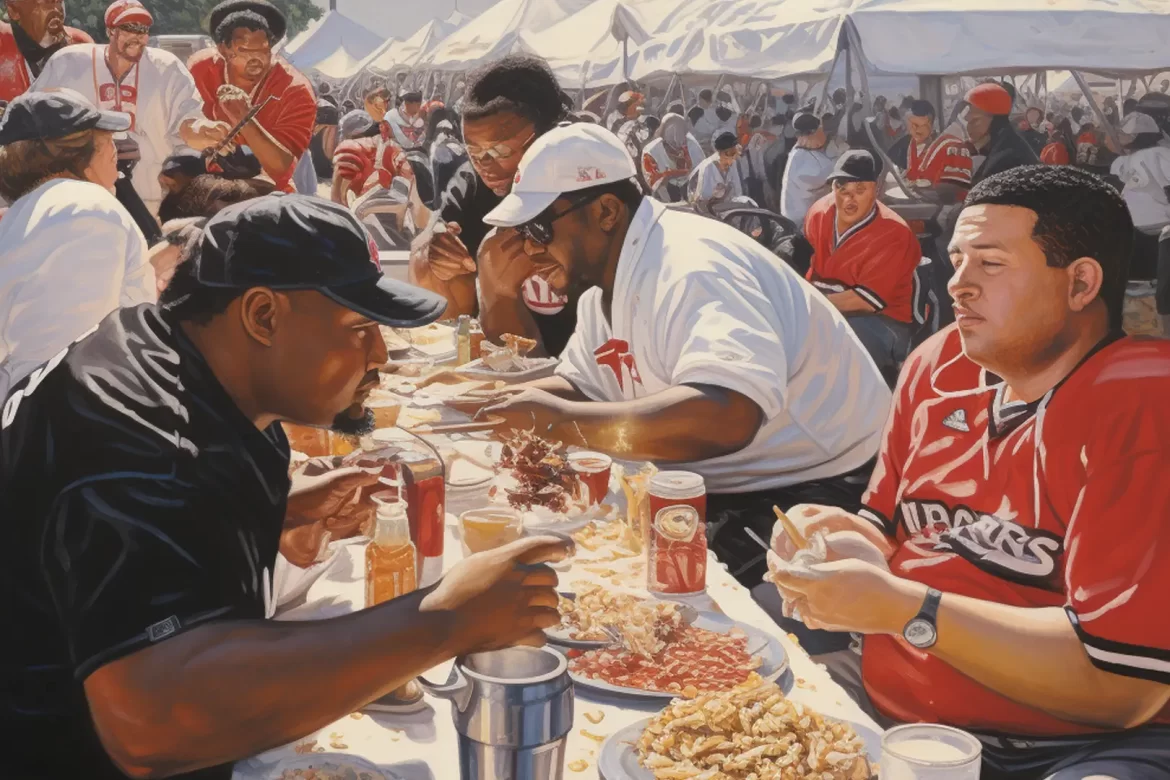
A Dad’s Guide to Tailgate Foods

by NRFT

Hey Papas, it’s tailgate season! We’re all revved up for good times, thrilling games, and of course, that sweet, sweet barbeque! But, let’s get real–a fantastic tailgate needs more than just chilled beers and fervent cheers and topless body painting. It requires a strong defense against unwanted foodborne opponents. So we’re here to lay down the law on maintaining food safety, keeping those stealthy bacteria at bay, and ensuring everyone leaves the game with nothing but good vibes.

Q. Tailgate Party on the Horizon – How Do We Keep Our Food Game Strong?

A. Safe temperature is your playbook! From your kitchen to the game, keeping your food at the right temperature is critical. The U.S. Department of Agriculture (USDA) has laid out some game plans:

  • Cold perishable food, like raw hamburger patties and chicken, needs to stay in an insulated cooler surrounded by ice or frozen gel packs. An appliance thermometer will make sure everything stays at or below 40 °F.
  • Wrap raw meat and poultry securely to avoid cross-contaminating other food.
  • Keep perishable cooked food refrigerator cold.
  • Got hot take-out? Eat it within 2 hours of purchase or 1 hour if it’s above 90 °F outside.
  • To keep hot food hot, like soup and chili, use an insulated container.
  • If you can’t keep hot food hot during the drive, chill it beforehand and reheat it to 165 °F at the tailgate.
  • Don’t forget the food thermometer! It ensures your meat and poultry hit the right temperature to knock out harmful bacteria.
  • Bring plenty of clean utensils and water for cleaning if none is available on site. And pack clean, wet, disposable cloths or moist towelettes and paper towels for cleaning hands and surfaces.

Q. What’s the Play on Marinated Meat?

A. Marinating meat adds flavor and tenderizes, but it needs the defense strategy too. Always marinate in the fridge, not on the counter. Reserve some marinades for basting or as sauce, and don’t reuse marinade from raw meat or poultry unless it’s boiled. Transport marinated meat and any reserved marinade in a cooler and keep it cold until it hits the grill.

Q. Can We Do a Partial Cook at Home to Speed Up Grill Time?

A. It’s a risky move. Partial cooking allows harmful bacteria to survive and multiply. If you start cooking meat or poultry, go for the touchdown and cook it to a safe temperature immediately.

Q. What’s the Score on Safe Temperatures?

A. Grilled food can brown fast on the outside, but a food thermometer is your quarterback here to ensure food reaches safe internal temperatures.

  • Raw beef, pork, lamb, and veal steaks, chops, and roasts: 145 °F and let them rest for at least three minutes before carving or consuming.
  • All raw ground meat: 160 °F.
  • All poultry: 165 °F.

Q. Cross-Contamination: How Do We Block It?

A. Use a clean platter for cooked food, don’t put it on the same one that held raw meat or poultry. In hot weather (above 90 °F), don’t let food sit out for more than 1 hour.

Q. Leftovers: Are They a Safe Bet for Later?

A. After enjoying the game and the grills, ensure the leftover food is ice cold (40 °F or below) and wasn’t out of the cooler or off the grill for more than 2 hours (1 hour when it’s over 90 °F outside). If not, it’s time to part ways.

Setting Up Your Game Day Grub: A No-Frills Tailgate Setup Guide

Alright, dads, listen up! We’re about to set the stage for a killer tailgate, and when it comes to game day, we all know the grub is half the battle. So, how do we set up a tailgate that’s got all the right flavors, keeps things clean, and leaves everyone full and happy? Well, it’s all in the setup! Let’s dive in and make it happen!

1. Early Bird Gets the Worm:

Arriving early gives you the prime spot and ample time to set everything up without breaking a sweat. It’s all about location, location, location! You’ll thank yourself when you have a solid spot close to the festivities but far enough from the masses.

2. Checklist Manifesto:

Before leaving the house, make a comprehensive checklist of all the essentials—grill, fuel, food, cooler, utensils, chairs, tables, trash bags, and so forth. Nothing puts a damper on the spirits like realizing you’ve left the burger patties or the can opener at home.

3. Zone Defense:

Divide your tailgate area into zones. You need a cooking zone, an eating zone, a chilling zone, and a cleaning zone. Each zone has its purpose, and it keeps the chaos in check. Trust me, organization is your best friend when you’re running the show.

4. Cooler Wisdom:

Pack your cooler like a pro. Cold stuff at the bottom, beverages in the middle, and anything you need quick access to at the top. And remember, you’re packing for preservation, not for a game of Tetris. Keep things tight, sealed, and secure.

5. Grill Sergeant:

Set up your grill securely in the cooking zone. It’s the heart of your operation, so make sure it’s stable, and there’s enough space around it to avoid any fire fiascos. Remember to bring an extra propane tank or bag of charcoal—you don’t want to run out of fuel mid-burger.

6. Food Prep Station:

Within your cooking zone, have a table or a portable surface for food prep. Keep it clean, and make sure you have all the utensils and cookware you need within arm’s reach. It makes the cooking process smoother, and it keeps the mess minimal.

7. Eats Strategy:

Plan your menu wisely. A mix of pre-prepared food and easy-to-cook items keeps things relaxed. Think marinated meats, pre-made salads, cut veggies, and simple grilled foods. And, always have some quick snacks on hand—chips, dips, and finger foods are game-day gold.

8. Hydration Situation:

Water, sodas, and, of course, beers. Keep the drinks flowing, but keep them organized. A separate cooler for beverages is a game-changer, and it keeps the traffic away from the food cooler.

9. Seating Game Plan:

Ensure there’s ample seating for everyone—foldable chairs, stools, or even cushions. A comfortable crowd is a happy crowd. But also, ensure there’s enough standing space for socializing and game discussions. It’s all about balancing the vibe.

10. Cleanup Crew:

Trash bags—have plenty of them and have them in every zone. Making it easy for people to dispose of their trash is key in maintaining order. The easier it is, the less likely you’ll find random trash scattered around your tailgate.

11. Entertainment Touchdown:

While the food is a major player, don’t forget the entertainment. Portable speakers, a football, or even a game of cornhole can keep the energy up, especially before the main event kicks off.

12. Safety Huddle:

Lastly, but by no means least, keep a first aid kit and a fire extinguisher nearby. Accidents happen, and being prepared can keep a small mishap from turning into a disaster.

After the Final Whistle: A No-Nonsense Guide to Tailgate Cleanup

Alright Dads, the game’s over, the cheers have died down, and it’s time to pack it up. I know, I know – cleaning isn’t the highlight of the day, but it’s gotta be done, and done right, especially when it comes to food. So, roll up your sleeves, and let’s tackle this together.

1. Divide and Conquer:

  • Leftovers: If it’s been out for more than 2 hours (or 1 hour in temps above 90°F), it’s time to say goodbye. Toss it! If it’s still within the safe timeframe, pack it in airtight containers and get it in a cooler pronto.
  • Disposable Items: Trash bags are your teammates here. Dump those disposable plates, cups, utensils, and any food wrappers into a bag. Seal it up tight and find a designated trash bin or take it with you if none is available.

2. Grill Dismantling:

  • Once the grill is cold, dismantle it safely. Dump the cold ashes into a metal can if you were using a charcoal grill.
  • Securely pack away any propane tanks or charcoal bags. Remember, safety first – we don’t want any unwarranted explosions or fire hazards.

3. Utensils and Cookware:

  • If you’ve got dirty cookware and reusable utensils, wipe them down with disposable cloths or moist towelettes. Secure them in a plastic bag to wash properly at home.

4. Cleanup Site:

  • Do a final sweep of your tailgating site. We’re respecting the space and leaving no trace behind. Pick up any stray trash and make sure the area is as clean, if not cleaner, than when you arrived.

5. Hand Hygiene:

  • Last, but by no means least, clean those hands with moist towelettes, hand sanitizer, or soap and water if available. You’ve handled a lot of stuff, and cleanliness is king.

Remember, when it comes to food safety, it’s all about maintaining the right defense strategy. Keep it clean, keep it safe, and here’s to victorious tailgating!

0 comments
0 FacebookTwitterPinterestEmail

Hey Dads out there! Welcome to another page from the book of real, rough-around-the-edges, been-there-done-that parenting. Today, let’s talk about something we all love—food. Not just any food, but the convenient, no-mess, no-fuss kind. Let’s talk take-out. It’s like the quarterback sneak of meal planning – quick, effective, and everyone loves it. And it almost always seems to work. But here’s the twist, . . . food poisoning is lurking, waiting to take down you and your whole family in the backfield.

Game Plan for Take-Out

So, you decided to go with the take-out? Nice. Convenience is key, especially when you’ve got a tribe to feed. But here’s the deal—keep it hot or keep it cold. Remember, hot food stays above 140°F, and cold ones below 40°F. It’s the food safety endzones, guys.

Bacteria, those tiny linebackers waiting to tackle your gut, thrive between 40 and 140°F. So, if your food’s playing in this danger zone for more than 2 hours, it’s a fumble. And in temperatures above 90°F? That’s a one-hour game, tops.

Leftovers: The Overtime Play

Let’s talk leftovers. It’s like the overtime of food. Your leftovers have a 3- to 4-day shelf life in the fridge, and after that, they belong to the trash can, not your stomach. Wrap them up tight, store them right, and when in doubt, throw it out. The last thing you need is a food safety penalty sidelining you for the week.

Restaurants: Scouting the Opposition

Choosing a restaurant is like scouting the opposing team. You gotta know what you’re up against. First, do a quick online recon—check those inspection scores on your local health department’s website. It’s like checking the opponent’s stats. High scores? You’re good to go. Anything less is playing with fire, and not the grill kind.

When you get there, you want to see certificates proving the kitchen managers know their plays, that they’ve got their food safety training down. You don’t want rookies handling your food, trust me. Watch out for the food-handling practices. Gloves and utensils are the gear protecting your food. If you can see food being prepared, make sure it’s protected.

Ordering the Play

Order your food like you’re calling the play. It’s got to be properly cooked, especially meat, seafood, poultry, and eggs. If they serve you an undercooked meal, send it back. And steer clear from lukewarm food. It’s the danger zone, remember? Cold food should be cold, hot food should be hot. It’s not rocket science and the restaurant should be able to get this right.

For the fans of buffets and salad bars, make sure the hot food is steaming and the cold food is chilled. If they’re serving lukewarm, it’s a no-go zone. Don’t let your guard down when it comes to eggs. Ask your server if they are using pasteurized eggs in foods like Caesar salad dressing, custards, and the like.

Refrigerate and Report: The Defensive Line

Got leftovers from eating out? Get them in the fridge ASAP. Again, remember the 2-hour rule, 1 hour if it’s hot out there. Any suspicion that you or someone you know got tackled by bad food, report it to your local health department. It’s like reviewing the play—it helps everyone.

Ideal Food Temperatures

The food temperature chart below is pivotal as it serves as a clear guideline to avoid the proliferation of bacteria and ensure the consumption of safe, well-prepared food, minimizing the risk of foodborne illnesses. By adhering to the recommended temperatures, individuals can thwart the growth of harmful pathogens that thrive in the “danger zone” between 40°F and 140°F. This chart is especially crucial for those handling food (such as you when you are re-heating it), as it consolidates food safety norms, fostering a healthy eating environment. In essence, it’s not just a guide—it’s an essential tool for maintaining health and wellness through conscious and informed eating.

Food ItemIdeal Hot TempIdeal Cold Temp
Cooked Poultry165°F (74°C)Below 40°F (4°C)
Cooked Pork145°F (63°C)Below 40°F (4°C)
Cooked Beef/Steak145°F (63°C)Below 40°F (4°C)
Cooked Fish145°F (63°C)Below 40°F (4°C)
Cooked Shellfish145°F (63°C)Below 40°F (4°C)
Cooked Lamb145°F (63°C)Below 40°F (4°C)
Cooked Veal145°F (63°C)Below 40°F (4°C)
Cooked Eggs160°F (71°C)Below 40°F (4°C)
Leftover Food165°F (74°C)Below 40°F (4°C)
Deli MeatsN/ABelow 40°F (4°C)
Milk/Dairy ProductsN/ABelow 40°F (4°C)
Fruits & VegetablesN/ABelow 40°F (4°C)
Baked GoodsN/ARoom Temp/Airtight

Conclusion: Securing the Win

Look, no one wants to be sidelined by bad food, especially when we’ve got little teammates relying on us. Be the quarterback of your kitchen, call the right plays, keep your eyes on the game, and make sure the food you’re bringing into your home is up to the standard. Let’s secure the win, keep our families healthy, and enjoy the convenience without the consequence.

Endgame Advice: Keep it Real

We’re all in this game together, trying to dodge the hits, make the right calls, and occasionally enjoy a hassle-free meal without cooking. Keep it real, keep it safe, and let’s make sure the only thing we’re catching is a good time and maybe, just maybe, a break from dishwashing.

0 comments
0 FacebookTwitterPinterestEmail

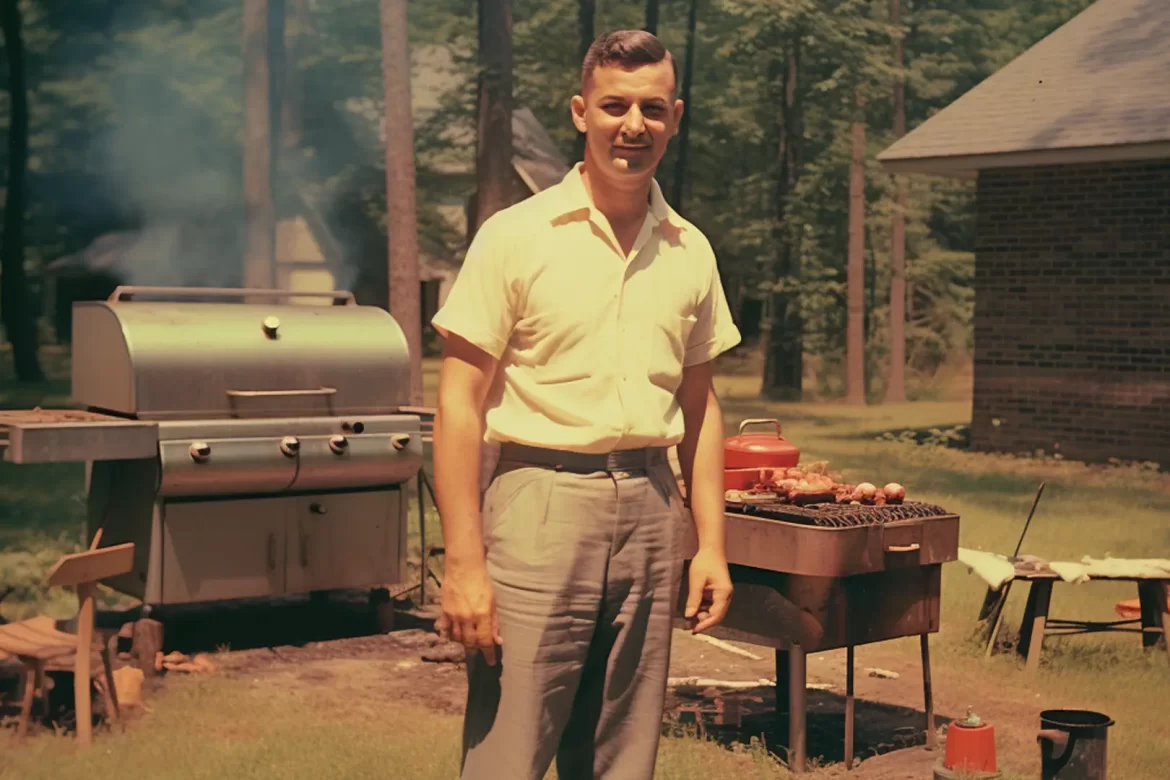
Grilling and Food Safety

by NRFT

The culinary delight of grilling is a versatile experience, now relished by many irrespective of seasons. The charm of a BBQ in the snow or under the sun has become a year-round celebration for over half of Americans. This evolution in culinary preferences makes it imperative to uphold stringent food safety norms to combat harmful bacteria and thwart foodborne ailments, ensuring a seamless and healthy outdoor cooking expedition. This comprehensive guide aims to illuminate the nuances of safeguarding food from purchase to plate, ensuring each bite is a symphony of flavors in a sanctuary of safety.

I. Proactive Purchasing: A Smart Beginning

A. Strategic Shopping:

Grilling starts not at the grill but at the grocery store. Buying cold products, especially meat and poultry, should be the final step before checkout to limit their exposure to warmer temperatures. Employ plastic bags to segregate raw meat and poultry to circumvent cross-contamination with other grocery items.

B. Considerate Commuting:

After grocery shopping, an immediate return home is pivotal to expedite the refrigeration of perishables. This becomes particularly crucial when the ambient temperature escalates above 90°F. In such situations, carrying a cooler with ice is a prudent choice to preserve the perishables.

II. Strategic Storing: The Refrigeration Ritual

A. Immediate Refrigeration:

Once home, prioritizing the immediate refrigeration of meat and poultry is non-negotiable. For those not destined for immediate consumption, a structured approach to freezing is vital. Whether it’s poultry, ground meat, or other kinds of meat, knowing when to freeze and when to refrigerate is crucial.

B. Safe Thawing:

Thorough thawing is paramount to attain uniform cooking. Slow, safe thawing in the refrigerator or using sealed packages in cold water are the recommended methodologies. Quick thawing using a microwave is also an option, provided the food proceeds straight to the grill.

III. Mindful Marinating: The Flavor Infusion

A. Marination Mastery:

Marination is a culinary art, serving dual roles of enhancing flavors and tenderizing the meat. While marination times vary, ensuring marination occurs within the safe confines of the refrigerator is indispensable for maintaining food safety.

B. Marinade Management:

Before immersing raw meat and poultry in marinades, reserving some for later use is recommended. Boiling used marinade before reusing it is crucial to eliminate any harmful bacteria, keeping the safety quotient intact.

IV. Transporting and Maintaining: Assurance on the Move

A. Cold Conservation:

The journey of food from home to the cooking spot necessitates an insulated cooler laden with ice or ice packs to sustain temperatures below 40°F. Maintaining cold food at low temperatures is essential, coupled with minimizing the frequency of cooler openings.

B. Compartmentalization and Cross-Contamination:

The compartmentalization of raw meats in well-sealed packages located at the cooler’s bottom is crucial to avoid leakage and consequent contamination. Employing cleanliness strategies with clean utensils, platters, and a steady water source or alternate cleaning solutions is pivotal.

V. Cooking and Serving: The Heart of Grilling

A. Precooking Precision:

Utilizing precooking techniques in the microwave, oven, or stove is an effective method to diminish grilling time, provided it is followed by immediate grilling. Cooking accuracy is fundamental, and the deployment of a food thermometer is essential to confirm the achievement of safe minimum internal temperatures.

B. Temperature Management:

After the grilling saga, maintaining the cooked food’s temperature above 140°F until served is vital. Employing diverse methods such as keeping them on the side of the grill rack, using an oven, a chafing dish, a slow cooker, or a warming tray is essential.

C. Hygienic Plating:

Serving the grilled delicacies involves using clean platters, avoiding the ones that previously held raw meat or poultry. This step is crucial, especially in elevated temperatures, to mitigate risks associated with harmful bacteria and ensuring the overall safety of the food consumed.

Grilling Temperatures

Below is a straightforward chart of recommended internal temperatures for a variety of foods typically grilled. These temperatures ensure that the food is safe to eat, eliminating the risk of foodborne illnesses.

Food ItemInternal TemperatureResting Time
Poultry
Whole Poultry165 °F (74 °C)None
Poultry Breasts165 °F (74 °C)None
Ground Poultry165 °F (74 °C)None
Meat
Hamburgers (Ground Beef)160 °F (71 °C)None
Pork (All Cuts)145 °F (63 °C)3 minutes
Veal (Steaks, Roasts)145 °F (63 °C)3 minutes
Lamb (Steaks, Roasts)145 °F (63 °C)3 minutes
Beef (Steaks, Roasts)
– Medium Rare145 °F (63 °C)3 minutes
– Medium160 °F (71 °C)None
– Well Done170 °F (77 °C)None
Fish & Shellfish145 °F (63 °C)None
Miscellaneous
Precooked Hot Dogs165 °F (74 °C) or untilNone
steaming hot
Leftovers165 °F (74 °C)None
Egg Dishes160 °F (71 °C)None

Notes:

  • Resting Time: The period after removing the food from the grill but before carving or consuming. This allows the juices to redistribute throughout the food.
  • Fish & Shellfish: Pay attention to the texture and opacity of the fish. It should be opaque and flake easily with a fork when it’s done.
  • Pork, Veal, Lamb, and Beef (Steaks, Roasts, Chops): These meats can be cooked to lower temperatures if they will be allowed to rest, as they will continue to rise in temperature during the resting period.

Remember to clean your food thermometer with hot soapy water before and after each use! And it’s always good to refer to the most current food safety recommendations from recognized health and food safety organizations, as recommendations might change over time with new research.

VI. Leftover Logistics and Alternative Methods

A. Preservation Protocols:

Swift refrigeration of leftovers in shallow containers is essential, especially in elevated temperatures. Regularly monitoring and maintaining correct temperatures are fundamental aspects of avoiding foodborne illnesses.

B. Smoking and Pit Roasting Nuances:

Smoking and pit roasting are intricate cooking methods, each requiring meticulous attention to temperature and cooking times. Whether it is a slow smoking process or an extensive pit roasting method, the use of a food thermometer is vital to ensure the safety and doneness of the meat.

VII. Conclusion

The grilling experience is an eclectic blend of flavors, techniques, and experiences, cherished throughout the seasons. While the joy of grilling is universal, maintaining unwavering food safety is the underlying linchpin. From proactive purchasing to meticulous marinating, from strategic storing to hygienic handling, every step is a stride towards a safe, enjoyable, and flavorful culinary journey. By embracing these comprehensive guidelines, one can relish the gastronomical delights of grilling while fostering a wholesome and secure environment, ensuring every bite is a dance of flavors within a fortress of safety.

Keeping Kids Safe Around a Grill

Grilling is a versatile and enjoyable way to cook, but it brings its own set of hazards, especially when children are involved. As the joyful laughter of children mingles with the crackle of the grill, the responsibility to ensure the young ones’ safety intensifies. Below are detailed guidelines and considerations to help maintain a safe environment around the grill for children.

Educate on the Dangers

In a world of children and grills, inform your small humans about the opera of pain that grills can conduct. They are not whimsical playgrounds; they’re orchestrated chaos, waiting to sear a careless visitor.

Establish a Safety Zone

Designate a ‘safety zone’ around the grill. Ideally, this should be a three-foot perimeter around the grill where children are not allowed to enter. Using outdoor rugs, chalk, or tape can help in visually demarcating this area and serves as a constant reminder for the children to stay away from the grill.

Supervision is Key

Never leave the grill unattended when children are around. Constant supervision is necessary to prevent any accidents. Kids are curious by nature, and the grill can be an object of fascination. Designate an adult who can watch over the grill and keep an eye on the children, ensuring that they do not come close to the grill.

Use Grill Tools Wisely

Long-handled grill tools are not just convenient; they are an added safety measure. They allow you to maintain a safe distance from the grill, reducing the risk of burns. However, these tools should be kept out of reach of children when not in use, as they can be sharp or have hot ends, posing a risk to curious kids.

Safe Placement of the Grill

The grill should be placed well away from play areas and walking paths to avoid any accidental bumps or knocks. It should be positioned away from fences, deck railings, and overhanging branches, which can catch fire. This not only keeps the kids safe but also ensures a safer grilling environment in general.

Regular Inspection and Maintenance

Regularly inspecting and maintaining the grill is essential for safety. Check for any loose parts, sharp edges, or rust that can pose a danger to kids. Ensure that the propane tanks are secure and that all the connections are tight. A well-maintained grill is less likely to have malfunctions that can lead to accidents.

Fire Safety Knowledge

Teach children basic fire safety knowledge. They should know the “Stop, Drop, and Roll” technique in case their clothes catch fire. Having a fire extinguisher nearby and knowing how to use it is vital. Educate older children about the location and usage of the fire extinguisher, ensuring prompt action in case of emergencies.

Teaching by Example

Leading by example is the best way to teach children about grill safety. By demonstrating cautious and conscious behavior around the grill, children will internalize these safety norms. Let them see you using grill tools properly, managing the fire sensibly, and respecting the safety zone.

Mindful of Food Placement

Keep the food you are about to grill or have grilled out of reach of children. This includes raw meat, which can harbor harmful bacteria, and hot food that can cause burns. The curiosity and the allure of delicious-smelling food can draw children closer to the grill; hence, keeping food away from their reach is a precautionary measure.

Wearing Suitable Clothing

While grilling, avoid wearing loose clothing that could catch fire easily. This is not just applicable to the person grilling but also to anyone, including children, who might be allowed near the grill. Educate children on the importance of wearing suitable clothing around grills to prevent any accidents.

Safeguarding Against Grill Tipping

Ensure that the grill is stable and has no risk of tipping over. Children running around can accidentally bump into the grill, causing it to tip over. By securing the grill and placing it on a flat, stable surface, you minimize the risk of it tipping over and causing harm.

First Aid Knowledge

Knowing basic first aid can be extremely beneficial. Teach older children the basics of first aid for burns and ensure that a first aid kit is readily available. Immediate application of first aid can reduce the severity of burns if any accidents occur.

Conclusiveness

By implementing these precautions and guidelines, you can create a secure environment around the grill for everyone involved, especially the children. These efforts, combined with constant vigilance and education, are pivotal in instilling a sense of responsibility and awareness in children regarding grill safety.

Through a well-rounded approach encompassing education, supervision, preventive measures, and preparedness, parents and guardians can ensure that the jovial atmosphere of a barbecue remains untainted by avoidable mishaps, and the memories created around the grill are solely of joy and togetherness.

Final Musings

In the maze of life, grills are the beacons of joy and potential harm, a dichotomy of existence. Narrate the tales of safety, draw the boundaries of respect, keep the sacred instruments sacred, and let the melody of laughter and the symphony of grilling intertwine into a harmonious dance, under the watchful eyes of guardians and the ancient wisdom of the flame. And so it goes, the dance of grilling with the young spirits swirling around in the universe of backyard tales.

0 comments
0 FacebookTwitterPinterestEmail

A Dad’s Guide to Food Safety

by NRFT

The Unvarnished Truth about Food Spoilage

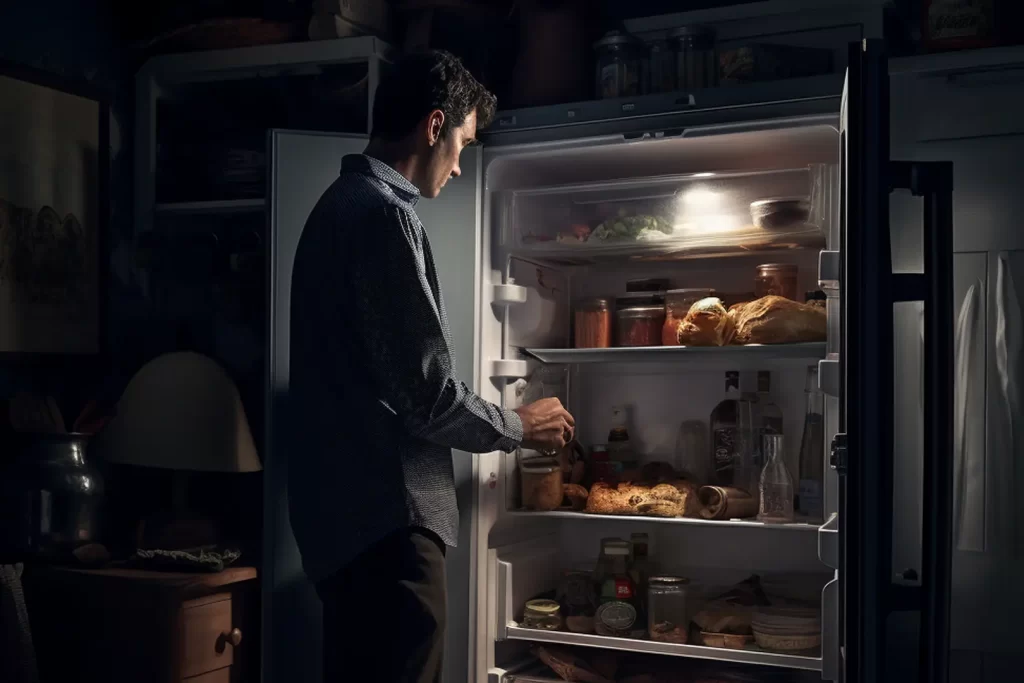
In the days of youthful indulgence, the kitchen was a place to rummage, experiment, and frankly, make a bit of a mess. It was all about satisfying hunger, with no foresight about meal planning or avoiding waste. The stakes were low, and the fridge was always stocked. However, the stakes changed when it was time to become a father. Suddenly, meal planning, grocery shopping, and avoiding waste became paramount, and the question of food spoilage loomed large. Who wants to make their kid (or wife) sick because something went bad?

Let’s look deeper into food safety and the science behind it.

“Best by” Dates and Optimal Quality

The terms “Best if Used by,” “Enjoy by,” and “Fresh through” are predominantly indicators of a product’s optimal freshness and quality, not necessarily its edibility. They offer a timeframe within which the product maintains its intended flavor and overall quality. However, products are typically safe to consume after the given date, albeit potentially with a compromise in flavor or quality.

Variabilities and Consumer Discernment

Food items like cereals, cookies, and pasta also maintain their safety well past the labeled dates, though they may acquire stale or off-flavors over time. It’s up to you how much you allow the food to deviate from its freshest form.

“Sell by” Dates and Inventory Management

The “Sell by” date serves as a guideline for retailers to manage inventory, indicating the duration for which a product should be displayed for sale. This date is unrelated to the actual safety of the food. Many items remain consumable for a considerable period past this date, depending on proper storage and the nature of the product. Milk, for instance, stays consumable for approximately five to seven days past its “sell by” date, contingent on storage and pasteurization conditions.

Sensory Evaluation

Concerns regarding food spoilage are best addressed by employing sensory evaluationessentially, if it smells off, it likely is. Ground meat, poultry, and other perishables should be used or frozen within a day or two past the purchase date, and eggs maintain their quality for three to five weeks past the “sell by” date if stored appropriately.

“Use by” Dates and Peak Quality

“Use by” date signifies the last date recommended for the consumption of a product while it’s at peak quality. This date is crucial especially for infant formulas, as consuming them by this date ensures the contained nutrients align with the label’s specifications.

The Role of Freezing

The “Freeze by” date denotes the timeframe within which freezing a product will maintain its peak quality. Freezing halts spoilage and bacterial growth, rendering foods safe indefinitely. However, prolonged freezing may affect the taste and texture of foods, but utilizing them in seasoned dishes can compensate for any loss of flavor.

Quality Over Safety

The core objective of these dating systems is to guide consumers regarding the product’s quality rather than its safety, except for specific products like infant formulas. The effectiveness of these dates in maintaining food quality is contingent upon various external factors, including transportation, storage, and the inherent characteristics of the food.

Consumers bear the responsibility to scrutinize the quality of the product, taking note of any signs of spoilage, before consumption. Open dating is prevalent on perishable items such as meat, dairy, and eggs, while closed or coded dates appear on shelf-stable products.

Are Foods Safe to Eat After the “Best By” Date Passes?

With exceptions like infant formula, if the date passes during home storage, a product should still be safe and wholesome if handled properly until spoilage is evident. Foods developing off odor, flavor or texture should not be eaten as they are spoiled due to the growth of spoilage bacteria. It’s important to note that viruses do not cause spoilage, and there are two types of bacteria found on food: pathogenic bacteria, which cause foodborne illness, and spoilage bacteria, which lead to food deterioration but not illness.

Requirements for Dating Infant Formula

Federal regulations mandate a “Use-By” date on the product label of infant formula under the inspection of the U.S. Food and Drug Administration (FDA). Consuming by this date ensures the formula contains not less than the quantity of each nutrient as described on the label. It’s crucial not to buy or use baby formula after its “Use-By” date.

Can Codes Explanation

Can codes are a form of closed dating which enables the tracking of products in interstate commerce. These are not meant for the consumer to interpret as a “Best if Used By” date. Cans must exhibit a code or the date of canning, and any can that is dented, rusted, or swollen should be discarded.

Dates on Egg Cartons

The use of a “Sell-By” or “Expiration” (EXP) date on egg cartons is not a Federal regulation but may be required by state egg laws. Eggs should be refrigerated in their original carton and placed in the coldest part of the refrigerator.

Safe Steps in Food Handling, Cooking, and Storage

To prevent foodborne illness, it is crucial to follow safe steps in handling, cooking, and storing food, since harmful bacteria that may cause illness can’t always be seen, smelled, or tasted. The four guidelines to keep food safe during every step of food preparation are:

  1. Clean—It is essential to wash hands and surfaces often.
  2. Separate—Raw meat should always be separated from other foods to avoid cross-contamination.
  3. Cook—All foods should be cooked to the right temperature to ensure harmful bacteria are killed.
  4. Chill—Food should be refrigerated promptly to slow the growth of harmful bacteria.

Cooking to Minimum Internal Temperatures

Cooking all food to the recommended minimum internal temperatures as measured with a food thermometer is essential before removing food from the heat source. Consumers may choose to cook food to higher temperatures based on personal preference. Below are the recommended minimum internal temperatures and rest times for various products:

  • Beef, Pork, Veal & Lamb (steaks, chops, roasts): 145 °F (62.8 °C) and allow to rest for at least 3 minutes
  • Ground Meats: 160 °F (71.1 °C)
  • Ground Poultry: 165 °F
  • Ham (fresh or smoked, uncooked): 145 °F (62.8 °C) and allow to rest for at least 3 minutes
  • Fully Cooked Ham (to reheat): Reheat cooked hams packaged in USDA-inspected plants to 140 °F (60 °C) and all others to 165 °F (73.9 °C)
  • All Poultry (including breasts, whole bird, legs, thighs, wings, ground poultry, giblets, and stuffing): 165 °F (73.9 °C)
  • Eggs: 160 °F (71.1 °C)
  • Fish & Shellfish: 145 °F (62.8 °C)
  • Leftovers: 165 °F (73.9 °C)
  • Casseroles: 165 °F (73.9 °C)

A New Lease on Leftovers

We often end up with leftovers, whether it’s from a meal cooked at home or a dinner at a restaurant. Making sure these are safe to consume is critical. When it comes to leftovers, it’s essential to kick unsafe practices to the curb and embrace techniques that leave bacteria out in the cold! Make sure your food is cooked to the proper temperature and gets tucked into the fridge without delay to steer clear of foodborne illness.

Safe Cooking is the Prelude to Safe Leftovers

Ensuring safe leftovers starts with cooking the food safely. Using a food thermometer, one must ensure that the food reaches a safe minimum internal temperature. Whether it’s red meats or poultry, they all have their specific temperatures they need to hit before they can be deemed safe. Remember, having your meats rest post-cooking isn’t just a culinary suggestion—it’s a safety one!

The Danger Zone: Not as Exciting as it Sounds

Bacteria have their paradise between 40° F and 140° F, the proverbial “Danger Zone.” Ensure your food doesn’t stay in this range for long. Keep hot foods hot and cold foods cold, and get those leftovers into the fridge within 2 hours, or just 1 hour if you’re out picnicking in the summer sun! If your perishable food has been out longer, it’s time to say a fond farewell and dispose of it.

Quick Cooling: A Rapid Retreat from the Danger Zone

When it comes to cooling food, speed is of the essence. To quickly hit that safe fridge storage temperature, divide your leftovers into smaller portions and use shallow containers. And remember, large cuts of meat can also benefit from a little downsizing before cooling!

Wrap it Up: Seal the Deal on Safety

Ensure your leftovers are covered well, using airtight packaging or sealed storage containers to keep those pesky bacteria at bay. This also helps to maintain the food’s moisture and keeps it from adopting the flavors of its refrigerator neighbors.

Safe Storage: The Long and Short of It

You can refrigerate leftovers for up to 4 days and freeze them for 3 to 4 months. Freezing can keep them safe indefinitely, but they might just lose a bit of their charm if left in the freezer for too long!

Thawing: It’s a Cold World

When thawing your frozen leftovers, options include the refrigerator, cold water, or the microwave. Each has its pros and cons, with refrigerator thawing being the safest but slowest. Whatever method you choose, ensure to cook the food before refreezing, especially when using the cold water method.

Reheating: Heating Up the Encore

Leftovers can be reheated safely even without thawing, but it will take a bit longer. When reheating, it’s crucial to get them back up to 165° F. Be it soups or casseroles, ensure to cover the food for even heating and to retain moisture. And when dealing with microwaves, rotate the food and use microwave-safe coverings.

Refreezing: The Comeback of the Leftovers

Refreezing the already reheated leftovers is perfectly fine as long as they have reached 165° F. If you’ve thawed more than you need, you can separate the needed portion and refreeze the rest without reheating it, giving your leftovers another chance to be the star of a meal.

The World of Foodborne Illnesses

Foodborne illnesses, often referred to as food poisoning, can cause serious and sometimes fatal diseases. These illnesses are predominantly caused by harmful bacteria, viruses, parasites, toxins, and chemicals that contaminate food at any point during its production, processing, or cooking. Understanding the different types of foodborne illnesses is crucial for maintaining optimal health and preventing the spread of diseases. Here’s how to win at Jeopardy when it comes to foodborne illnesses:

1. Bacterial Foodborne Illnesses

a. Salmonella

Salmonella bacteria are the leading cause of foodborne illnesses globally. They primarily affect eggs, poultry, meat, unpasteurized milk, and other dairy products. Infection can lead to fever, diarrhea, and abdominal cramps.

b. E. coli

E. coli is found in the intestines of humans and animals. Most strains are harmless, but some, like O157:H7, can cause severe abdominal cramps, bloody diarrhea, and vomiting. It’s mainly associated with undercooked ground beef, unpasteurized milk, and contaminated water.

c. Listeria

Listeria affects ready-to-eat foods like deli meats, hot dogs, smoked seafood, and soft cheeses. It can lead to a severe infection called listeriosis, especially dangerous for pregnant women, older adults, and people with weakened immune systems.

d. Campylobacter

Found in raw and undercooked poultry, unpasteurized milk, and contaminated water, Campylobacter infection can cause diarrhea, cramping, abdominal pain, and fever.

2. Viral Foodborne Illnesses

a. Norovirus

Norovirus is highly contagious and causes inflammation of the stomach and intestines, leading to vomiting, diarrhea, and stomach pain. It is often associated with ready-to-eat food and contaminated water.

b. Hepatitis A

Spread primarily through food or water contaminated by fecal matter, Hepatitis A affects the liver and leads to jaundice, fatigue, abdominal pain, and liver function abnormalities. Shellfish from contaminated water are common carriers.

3. Parasitic Foodborne Illnesses

a. Toxoplasma

Toxoplasmosis, caused by Toxoplasma, is typically contracted from undercooked, contaminated meat, especially pork, lamb, and venison. It can cause flu-like symptoms and muscle aches and pains.

b. Cryptosporidium

Known for causing Cryptosporidiosis, this parasite is associated with contaminated water, leading to watery diarrhea, stomach cramps, dehydration, and nausea.

c. Giardia

Giardia infections come from a parasite found in backcountry streams and lakes, often affecting hikers and campers who consume untreated water. Symptoms include diarrhea, gas, stomach cramps, and dehydration.

4. Prion Disease

a. Variant Creutzfeldt-Jakob Disease (vCJD)

vCJD is a rare and severe neurological disorder caused by consuming products from cattle affected by Bovine Spongiform Encephalopathy (BSE), commonly known as mad cow disease. It leads to severe mental deterioration and loss of muscle control.

5. Toxic Foodborne Illnesses

a. Ciguatera Poisoning

This illness arises from consuming warm-water fish contaminated with ciguatoxins. It can cause nausea, vomiting, diarrhea, muscle pain, numbness, tingling, heart problems, and even reversal of hot and cold sensation perception.

b. Scombroid Poisoning

Scombroid poisoning is linked to eating spoiled fish, including tuna and mackerel. It induces flushing, headaches, itching, blurred vision, abdominal cramps, and diarrhea.

6. Fungal and Algal Foodborne Illnesses

a. Aflatoxins

Produced by molds on nuts and grains, aflatoxins can cause liver damage and cancer.

b. Shellfish Poisoning

Consuming shellfish contaminated with harmful algae leads to various types of shellfish poisoning, causing symptoms ranging from diarrhea and abdominal cramps to memory loss and death, depending on the toxin involved.

Prevention and Control

Controlling foodborne illnesses involves adopting meticulous food hygiene practices, proper cooking and storage, and adhering to food safety guidelines. Washing hands regularly, avoiding cross-contamination, and consuming properly cooked food are essential steps in preventing these illnesses. Public health initiatives and awareness are also critical in controlling the spread and impact of foodborne diseases.

Who is at Risk?

Although anyone can contract foodborne illness, infants, pregnant women, older adults, and individuals with compromised immunity are at heightened risk, with severity ranging from mild discomfort to fatal outcomes. The variability in the reaction to harmful bacteria is also notable; some might fall ill after consuming a small amount, while others remain unaffected even after consuming thousands.

How to Prevent Foodborne Illness

Microorganisms on food products at the time of purchase can cause this illness. However, not all bacteria are harmful; some are essential for producing cheese and yogurt. Cross-contamination is a significant concern, and adequate cooking and processing are vital to destroy pathogens. Adhering to safe temperature ranges and maintaining personal hygiene are crucial in preventing foodborne illnesses.

Safety Measures

  1. Maintain Optimal Storage Conditions:
    • Ensure the secure and proper storage of food items by adhering to the prescribed temperature ranges. This practice curtails the proliferation of harmful microorganisms, thereby reducing the risk of food spoilage and contamination.
  2. Adhere to Minimum Cooking Temperatures:
    • Abide by the recommended minimum internal temperatures when preparing meals to guarantee the elimination of any potentially harmful bacteria or pathogens. Utilizing a food thermometer can aid in certifying that the food has reached a safe temperature for consumption.
  3. Practice Vigilance with Perishable Goods:
    • Exercise caution and prudence with perishable food items. Refrain from consuming products that have surpassed their indicated shelf life to prevent the ingestion of deteriorated or unsafe food, minimizing the risk of foodborne illnesses.

Questions and Answers

  1. Q: How long do fruits and vegetables last in the fridge?
    • A: Their lifespan varies widely. Leafy greens and root vegetables have a longer shelf life compared to soft berries and ripe fruits. However, the safety of these items depends more on their condition rather than a fixed timeline.
  2. Q: How long does meat last in the fridge?
    • A: Meat generally has a shorter shelf life compared to fruits and vegetables due to its susceptibility to bacteria. Depending on the type, it can last from 3-4 days to 3-5 days in the fridge, but it’s safest to adhere to use-by labels or freeze if there’s a delay in consumption.
  3. Q: How long do leftovers last in the fridge?
    • A: Typically, 3-4 days, but it can extend up to 5-7 days depending on the ingredients. Trusting one’s judgment about the condition of the food is crucial.
  4. Q: How long does food last when the power is out?
    • A: A standard fridge keeps food cold for four hours post power outage. After this, it’s safe at warmer temperatures for two hours. However, transferring to a freezer or a cooler can prolong this period.
  5. Q: How can you tell when your food has spoiled?
    • A: Signs like unusual odor, flavor, or texture indicate spoilage. Trusting one’s senses is the best approach. However, some signs, like mold on hard cheeses, don’t necessarily mean the food is unsafe.
  6. Q: How can you prevent food spoilage?
    • A: Strategic meal planning, using oldest ingredients first, maintaining proper storage conditions, and regular cleaning are effective strategies.

Only You Can Prevent Food Illness

Foodborne illness is a significant and often underestimated public health issue. Knowledge about food safety, understanding of contamination sources, and preventive measures are crucial in mitigating risks associated with foodborne diseases. In managing food storage and consumption, relying on one’s judgment and understanding of food condition is often more accurate than adhering strictly to labeled dates. Balancing caution with practical knowledge ensures both safety and minimal food wastage.

0 comments
0 FacebookTwitterPinterestEmail
Are you sure want to unlock this post?
Unlock left : 0
Are you sure want to cancel subscription?
-
00:00
00:00
Update Required Flash plugin
-
00:00
00:00